Creations By Cathy - live happy
  • Facebook
  • Twitter
  • Pinterest
  • Instagram
  • Email
  • RSS
Menu
Skip to content
  • home
  • about
  • blog
  • shop
  • contact
  • pinterest

a love that remembers

1 / 25 / 13

kiss little boy and girlromance

Just look at their faces… That, my friends, is love.  True  love.  This beautiful pic and story are originally from a wonderful blog… Bella Camila. (Thank you, Camila)  Please check it out! And another big thank you to “Tyler Knott Gregson” for his touching words, as well. A guy named Tyler is just gonna write things like that.  I know this from experience… trust me. Yes – for me, love began in 2nd grade. He was my first boyfriend. Tyler Ledford.  Looked kinda like that cute little guy in the pic above, actually. No, Dad.  That’s not me.  We didn’t kiss.  He did, however, try to put his arm around me when we were watching a movie in class.  No worries, tho.  The teacher put an end to that – Ha!

wink, wink to you, Tyler.  Wherever you are.   I hope you are as happy (in love) as I am…

It was a busy morning, about 8:30, when an elderly gentleman in his 80′s arrived at the hospital to have stitches removed from his thumb. He said he was in a hurry as he had an appointment at 9:00 am. The nurse took his vital signs and had him take a seat, knowing it would be over an hour before someone would to able to see him. I saw him looking at his watch and decided, since I was not busy with another patient, I would evaluate his wound. On exam, it was well healed, so I talked to one of the doctors, got the needed supplies to remove his sutures and redress his wound.

While taking care of his wound, I asked him if he had another doctor’s appointment this morning, as he was in such a hurry. The gentleman told me no, that he needed to go to the nursing home to eat breakfast with his wife. I inquired as to her health.

He told me that she had been there for a while and that she was a victim of Alzheimer’s Disease. As we talked, I asked if she would be upset if he was a bit late.

He replied that she no longer knew who he was, that she had not recognized him in five years now. I was surprised, and asked him, ‘And you still go every morning, even though she doesn’t know who you are?’

He smiled As he patted my hand and said, ‘She doesn’t know me, but I still know who she is.’

Leave a comment
Share
  • Pin it
  • Share
  • Tweet
  • Share
  • Email

lavender hot chocolate

1 / 24 / 13

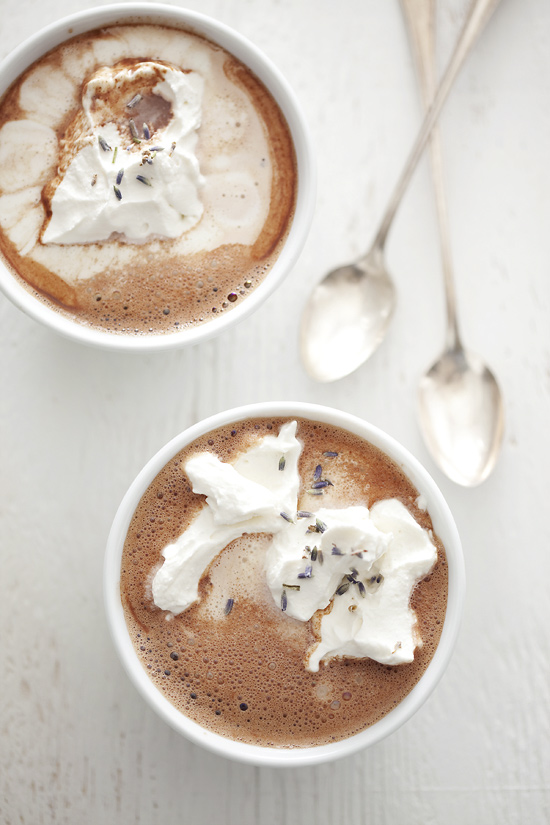
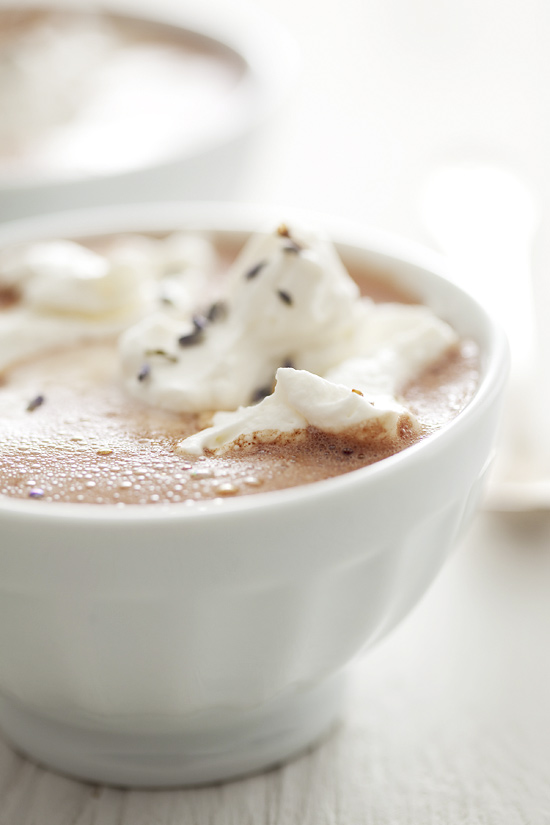
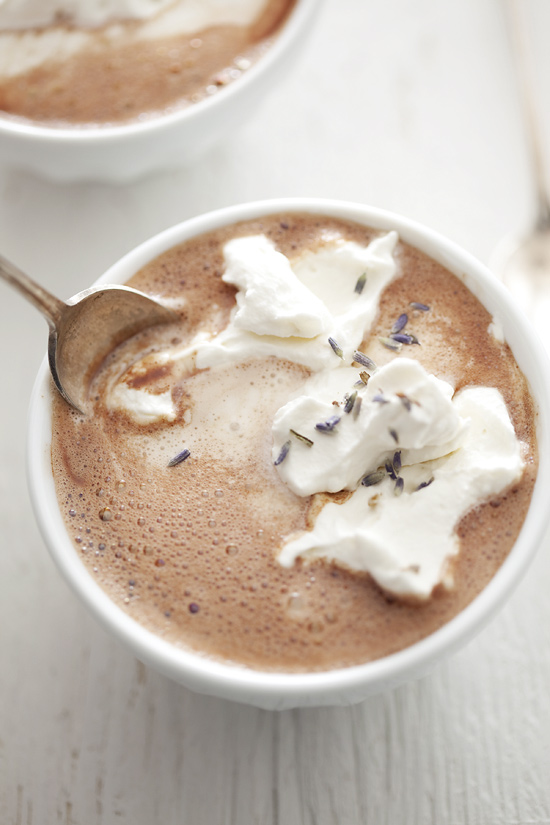
lavender hot chocolate

In Southern California, we’re blessed with a relatively mild and short winter season. Incredibly, while the rest of the country may still be under a blanket of snow, here it’s already warming up to the low 70s during the day. That doesn’t mean a nice, piping mug of hot chocolate isn’t welcomed in the early morning hours, or late at night (in my case, since I’m not much of a morning person).

Inspiration for this drink came from an amazing hot chocolate I had at a bar after a day of snowboarding at our local mountains. It was so incredibly rich, creamy, and comforting I found myself enjoying it more than the pale ale I had ordered for myself. After returning from my trip, I had to try recreating it at home.

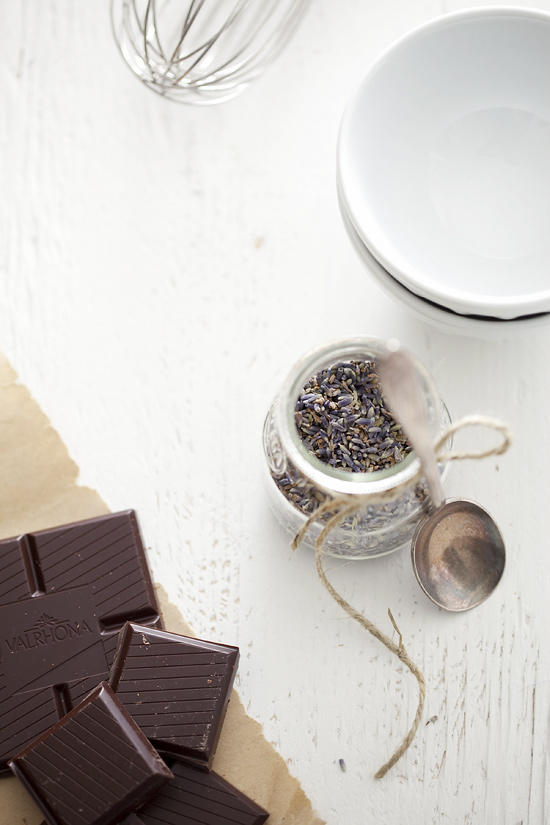
For richness, I used whole chocolate instead of cocoa powder. I’m sure cocoa powder would have been fine, but the combination of bitter dark chocolate and creamy milk chocolate just seemed more indulgent and sinful. The addition of lavender was inspired by the lovely latte and waffles drizzled with chocolate lavender sauce from Café Medina. At this point you’re probably thinking, gross, I don’t want my hot chocolate smelling like soap. Trust me, with just the right amount, it’s wonderfully soothing and relaxing.

Give it a shot, and let me know what you think!

lavender hot chocolate

Since lavender is quite fragrant, adjust amount according to preference. For a creamier hot chocolate, a 1 to 1 ratio of dark to milk chocolate can be used. Makes 2 servings.

hot chocolate:

  • 2 cups whole milk
  • 3 ounces dark chocolate (70% cacao)
  • 1 ounce milk chocolate
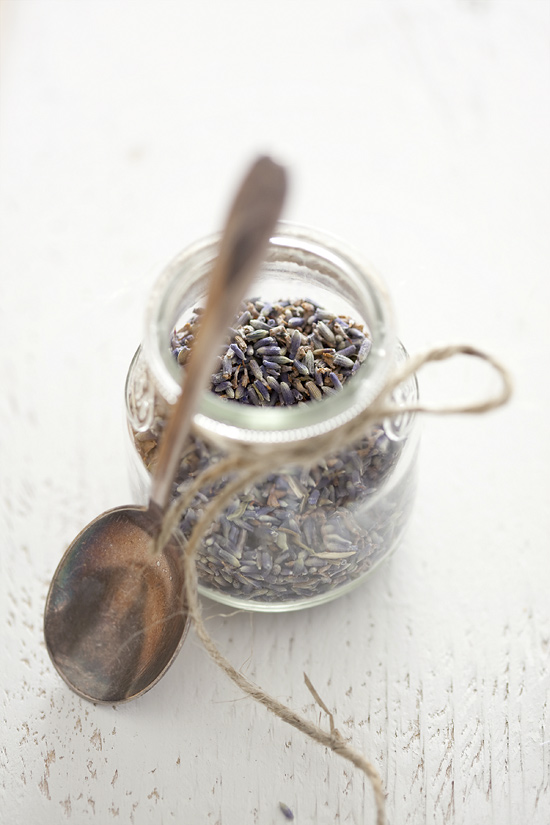
  • 1/4 teaspoon lavender buds

whipped cream:

  • 1/2 cup cold heavy whipping cream
  • 1/4 teaspoon vanilla extract or seeds from 1/4 of a whole vanilla bean pod
  • 1/2 tablespoon granulated white sugar

For whipped cream, place cold cream, vanilla, and sugar into a cold mixing bowl. Beat the mixture with a whisk or mixer until stiff peaks form. keep refrigerated until ready for use.

For hot chocolate, heat milk and lavender over medium heat, whisking occasionally until the milk begins to simmer. Remove from heat and let lavender steep for 5 minutes. Strain lavender and return milk to saucepan. Over medium heat, add chocolate and mix until chocolate is melted and incorporated. Whisk milk mixture for 10-20 seconds until frothy. Pour into mugs or bowls and serve with a dollop of whipped cream.

This delish & decadent recipe for “Lavender Hot Chocolate” came from a wonderful site that you MUST check out… a la mode. The photography on the site is just gorgeous… and this particular recipe is absolute PERFECTION on this COLD, COLD winter day!!  Enjoy my friends, and thank you, “a la mode“!!

2 Comments
Share
  • Pin it
  • Share
  • Tweet
  • Share
  • Email

color me happy

1 / 23 / 13

paper chainact of kindness

rainbow cake

juicing

painted stairspainted wooden spoons

2 Comments
Share
  • Pin it
  • Share
  • Tweet
  • Share
  • Email

perfectly placed pearls

1 / 22 / 13

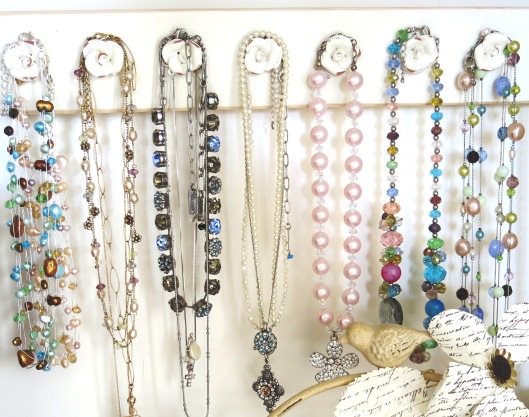
jewelry storageSo every day, my friend Martha (Stewart) sends me an “organizing tip of the day”. (Thanks, Martha) Let’s just say that I have been feeling pretty good about the (slow and) steady progress that I have been making in this department.  Now mind you, this “organize my life” project started way before the whole “New Year’s Resolutions” thingie…  As a matter of fact (confession alert!!), this “organizational mode of thinking” actually WAS a “New Year’s Resolution”.  In 2012.  OK.  So it’s “long-term”.  So what.  At least I’m still plugging away; Right???  So back to the part where I am feeling pretty good about my progress.  Today’s tip really threw me for a loop.

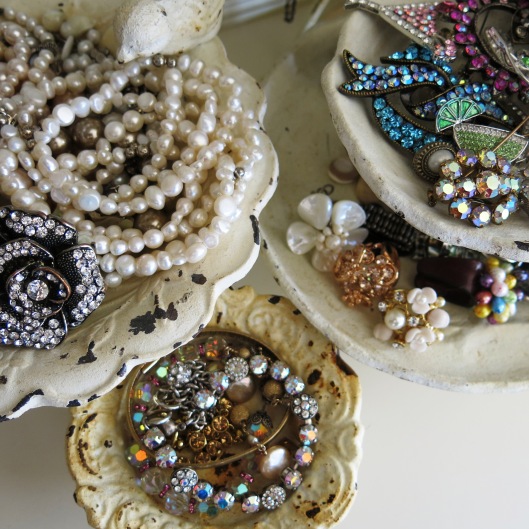
“Jewelry boxes can be handy, but they can also turn your prettiest baubles into unsightly nests of knots.  Let your hodgepodge of china collect something besides dust: Orphaned teacups and saucers are perfect vessels for sorting jewelry, and, when arranged in a velvet-lined drawer, they give you an easy-to-scan bird’s-eye view of your bijoux. To set it up, measure the height of the drawer’s side (not the front), then gather dishware that’s slightly shorter. Line the drawer with velvet or felt to prevent rattling and sliding, then position the porcelain. Hook drop earrings on rims of cups, nestle necklaces within them, and stash chunkier beads and bangles on individual saucers.” (From Martha Stewart )

Upon reading today’s tip, I started to question my efforts and progress thus far.  In reality, would I EVER really get to the point where everything was SO organized that I would be out shopping for vintage teacups in a specified height to delicately arrange in my (velvet lined) jewelry drawer…??  Probably not.  And that’s OK.

hanging jewelry

jewelry

But some of my necklaces are hanging, my rings are separated fom my pins, my pearls are all (blobbed together) in a pink cut crystal bowl, and I have a vintage mirror that I found in an antique store that I “blinged” (This last bit of trivia has absolutely no relevance.  I just like the mirror.)  So Martha – I’m looking for your approval, perhaps (?), that indeed I AM moving in the right direction…?

pearls3

jeweled mirror

If not;  I did come across some pretty “orphaned” teacups.  Fine.  I’ll start measuring the drawers…

teacups

1 Comment
Share
  • Pin it
  • Share
  • Tweet
  • Share
  • Email

peppermint taffy

1 / 21 / 13

peppermint taffy recipeSo the kids are home today; it’s cold outside; and these are the most beautiful color.  Three good reasons to give this old-fashioned (“pretty in pink”) peppermint taffy from Taste of Home, a whirl!! The soft chewy taffy has a milk minty flavor, and it won’t stick to the wrapper.

Prep: 1-3/4 hours + cooling

Ingredients

  • 2-1/2 cups sugar
  • 1-1/2 cups light corn syrup
  • 4 teaspoons white vinegar
  • 1/4 teaspoon salt
  • 1/2 cup evaporated milk
  • 1/4 teaspoon peppermint oil
  • Red food coloring

Directions

  • Butter a 15-in. x 10-in. x 1-in. pan; set aside. In a heavy large saucepan, combine the sugar, corn syrup, vinegar and salt. Cook and stir over low heat until sugar is dissolved. Bring to a boil over medium heat. Slowly add the milk; cook and stir until a candy thermometer reads 248° (firm-ball stage).
  •    Remove from the heat; stir in peppermint oil and food coloring, keeping face away from mixture, as odor is very strong. Pour into prepared pan. Let stand for 8 minutes or until cool enough to handle.
  •    With well-buttered fingers, quickly pull candy until firm but pliable (color will become light pink). Pull into a 1/2-in. rope; cut into 1-in. pieces. Wrap each in waxed paper. Yield: 1-3/4 pounds.

Editor’s Note: We recommend that you test your candy thermometer before each use by bringing water to a boil; the thermometer should read 212°.  Adjust your recipe temperature up or down based on your test.

Nutritional Facts 1 serving (2 each) equals 174 calories, trace fat (trace saturated fat), 2 mg cholesterol, 66 mg sodium, 44 g carbohydrate, 0 fiber, trace protein.

Leave a comment
Share
  • Pin it
  • Share
  • Tweet
  • Share
  • Email

happy new year!!

1 / 1 / 13

bonne annee

Notes: The simplest way to wish someone a happy new year in French is with Bonne année !, but Bonne année et bonne santé is a classic expression. In English, we say “happy new year,” but the “new” is unnecessary in French – bonne année does the whole job. The addition of bonne santé (good health) is not only a nice thought, but it also rhymes, making a little sing-songy sort of phrase. 
**Interestingly, kissing under the mistletoe is a New Year’s custom in France, rather than a Christmas custom as in other countries.  Hmmm… I’m thinking – How about BOTH?!

And now, for a few more random New Year’s Day thoughts and musings…

daily affirmationHow about a Daily Affirmation (from “Jessica”). For such a young girl, she has much to teach us, I think.  A great way to start each day of the new year…!  And then there is that “all too familiar” New Year’s resolution – I’m gonna work out… again… more… every other Tuesday…. once…???

Decision.  This year, rather than “New Year’s Resolutions” – I’m thinking more about a 2013 “bucket list” of sorts.  I guess that “thinking” is the key word here – as I am actually still forming this 2013 list.  bucket list more

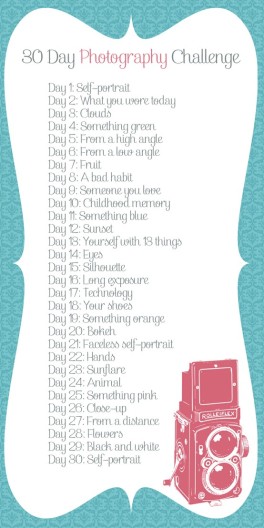
I do know certain things that WILL be included…. moving my parents and my brother here to Kansas City, blogging more 🙂 taking a photography course (and, of course, taking a TON of pictures!), re-working my “Creations” room and then using that room to CREATE…!!!!  There are so many creative ideas in my head… and I am so ready to start doing them… rather than just wishing that I was doing them!

30 day photography challengemaking things

I’m really excited about all that is ahead for the year, actually.    It’s going to be a good year.  So how about you…?  2013 will be my year

What’s on your “bucket list” for 2013?

Leave a comment
Share
  • Pin it
  • Share
  • Tweet
  • Share
  • Email

scrumptuous seasonal sipping

12 / 13 / 12

Candy-Cane Marshmallows         

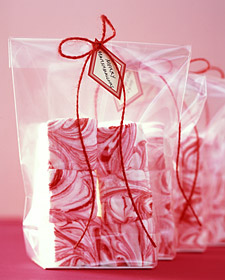
Christmas candy cane marshmallowsGive out homemade treats that are great in hot cocoa (see below) – or straight from the bag. Peppermint marshmallows are easy to make; they get their red swirl from a quick marbleizing technique. Follow our recipe, then package them in small cellophane bags to show off their good looks. Fold the top of each bag over once, and staple it shut. Use a small hole punch on either side of the staple. Thread a length of red twine through the holes, and knot it in front. Pull one end through a gift tag, and finish with a bow.

                     Link: Martha Stewart Living, December 2004             

  • Yield Makes sixteen 2-inch squares

Ingredients:

  •                                         Vegetable-oil cooking spray
  •                                         2 cups sugar
  •                                         1 tablespoon light corn syrup
  •                                         4 packages (1/4 ounce each) unflavored gelatin
  •                                         3/4 teaspoon peppermint extract
  •                                         2 large egg whites
  •                                         2 teaspoons red food coloring
  1.  Coat an 8-inch square pan with cooking spray; line bottom with parchment paper. Coat the parchment with cooking spray, and set pan aside. Put sugar, corn syrup, and 3/4 cup water in a small saucepan. Cook over medium heat, stirring, until sugar is dissolved. Stop stirring; let mixture come to a boil. Raise heat to medium-high; cook until mixture registers 260 degrees on a candy thermometer.
  2. Meanwhile, sprinkle gelatin over 3/4 cup water in a heatproof bowl; let stand 5 minutes to soften. Set the bowl with the gelatin mixture over a pan of simmering water; whisk constantly until gelatin is dissolved. Remove from heat, and stir in extract; set aside.

3.  Beat egg whites in the bowl of an electric mixer fitted with the whisk attachment until stiff (but not dry) peaks form. Whisk gelatin mixture into sugar mixture; with mixer running, gradually add to egg whites. Mix on high speed until very thick, 12 to 15 minutes.

4. Pour mixture into lined pan. Working quickly, drop dots of red food coloring across surface of marshmallow. Using a toothpick, swirl food coloring into marshmallow to create a marbleized effect. Let marshmallow stand, uncovered, at room temperature until firm, at least 3 hours or overnight. Cut into squares.

OK.  Now we have these delicious (and bee-u-tee-ful!) “candy-cane marshmallows”, courtesy of Martha Stewart (and her team!)… so how about something EQUALLY delicious to serve with them??? Like maybe a cup of yummy hot cocoa?  And since we’re sharing recipes for “sumptuous seasonal sipping“; how about a little spiced cider and some holiday eggnog?  No problem… “epicurious” is here to help.  Click this link: Spiced cider, hot chocolate and holiday eggnog, and/or – read on!  Click on the links below for individual recipes.  I guarantee there is something for everyone!!

A Toast to the Season

When it comes to drinks, this truly is the season of comfort and joy. Whether it is a steaming mug to take off the chill after shopping or a bowl of spirited eggnog to jump-start your holiday party, everybody delights in raising a glass of holiday cheer. Happy days to all!

drink tips:

  • Take Your Time

Never let the milk boil when making hot chocolate. Heat it slowly until just steaming to prevent lumps or a skin from forming.

  • Stay Cool

To keep things safe, once mixed, eggnog should be refrigerated until served. It’s not a good idea to add ice, though—once it melts, it’ll water down the nog. Instead, pre-chill the punchbowl (if it doesn’t fit in the fridge, pack it with ice).

  • Best Bubblies

For Champagne punches, there’s no need to fork over a ton of money for an expensive sparkler—a good domestic sparkling wine will serve beautifully. For fruity drinks, try a lightly sweet (demi-sec) variety rather than dry (brut).

  • Plan Ahead

Mix several large pitchers of the basic ingredients of your punchbowl drink in advance. The last few steps can be done in smaller batches as needed.

Spiced Ciders

The scent of the season

  • Tree-Trimming Cider Punch
  • Mulled Apple Cider with Orange and Ginger
  • Spiced Apple Cider
  • Mulled Cider

Cups of Chocolate

Morning, noon, and night, a classic comfort drink

  • Creamy Hot Chocolate
  • Mocha Hot Chocolate
  • Spiced Hot Chocolate
  • Ultra-Rich Hot Chocolate

Once-A-Year Riches

Ideal centerpieces for any festivity

  • Bourbon and Dark Rum Eggnog
  • Four Spirits Eggnog
  • Maryland Eggnog
  • Virginia Eggnog

Read More http://www.epicurious.com/articlesguides/holidays/christmas/drinkrecipes#ixzz2ExSjdgZH

Leave a comment
Share
  • Pin it
  • Share
  • Tweet
  • Share
  • Email

it’s beginning to smell a lot like Christmas…

12 / 9 / 12

orange clove

Oh my ~ how does one describe the scents of Christmas…. 

Pine needles and Christmas trees, gingerbread, peppermint candy canes, fresh oranges (and cloves!), Christmas cookies fresh from the oven, mulled cider or wine, a steaming cup of hot cocoa… As different as it may be for each one of us, I think there is also a real “connectedness” when it comes to the scents of the Christmas season.  So good news.  I have THREE special treats for you to enjoy today, and I think that you are going to enjoy each one of them… Please let me know if you try one or have a favorite!

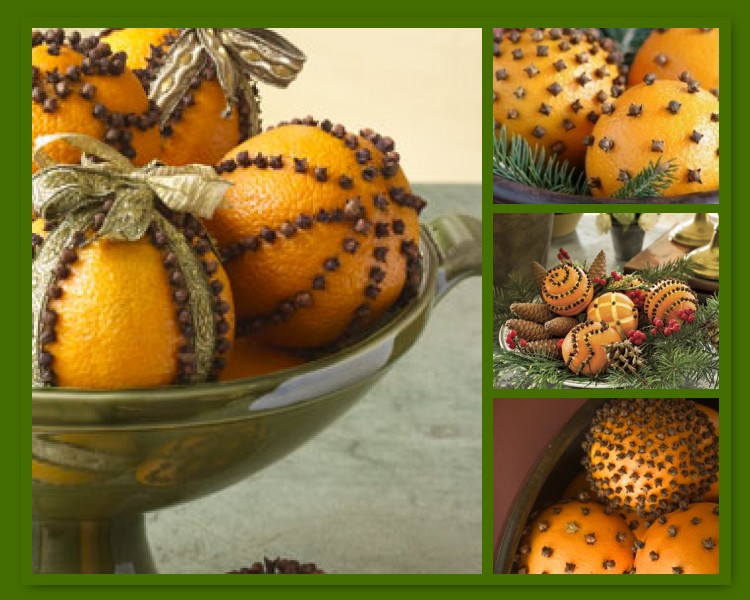
(#1) Orange Clove Pomanders (pic above)

I make these every year, and if you have never made one… this is the year to give it a go.  They smell SO good (especially while you are making them), the “design” ideas are endless, they cost next to nothing and they are SUPER SIMPLE!!!  Here is a little video to get you motivated…Orange Clove Pomanders.  OK, and another one…

As for the next little yummy scented goodie, I have a few people to thank.  Grace Bonney has a wonderful blog that is chocked full of great ideas, “Design Sponge”, and I strongly encourage you to check it out!  Secondly, the writer of the article (below) is part of the Design Sponge team, and her name is Ashley English.  To check out her posts, click here.  Finally, a thank you to my friend, Jerrod (from Brandtabulous), for turning me on to the site initially!!  Big thanks to all…

(#2) Small Measures: Natural Room Spritz

I have what I’ve dubbed a “hound’s nose.” Depending on how you look at it, this can be a blessing or a curse. I can sniff out specific aromas as soon as I step into a business or residence. This is great when it’s a French bakery, and less pleasant when it’s, say, a cat’s litterbox. When I was pregnant, this sense was magnified. Oh, the gripes my long-suffering husband had to withstand!

The thing is, though, that my particular olfactory department is especially affected by synthetic smells. I’ve been in the car with my mother when she decided to remove her nail polish and just about had to pull the car over because of my intense reaction to her polish remover’s scent. So when it comes to fragrances in my home, I go as natural as possible. There are a number of truly wonderful room spritzers available for purchase today, but I love whipping up a bottle of my own. It’s easy to do, cost effective (once you’ve purchased some essential oils, that is) and customizable in multitudinous permutations.

For today’s Small Measures, I’m sharing three seasonally themed all-natural room-spritz blends. Now you can freshen up your space while keeping synthetic (and potentially toxic) ingredients out. And if your nose is anything like mine, this is a very, very good thing indeed! — Ashley English

spray1
spray2
spray3
room spray

Any time I come across a bottle whose shape or general appearance appeals to me, I remove the label and squirrel it away for later use. This comes in handy when making room spritzers. All of the bottles and misters shown above were up-cycled from their previous incarnations (which include a bottle of Chinese herbs, a vanilla extract bottle and a personal fragrance bottle). If you don’t have bottles or misters on hand, you can often find both at natural foods stores or at Mountain Rose Herbs (a wonderful supplier of essential oils, also).

For each of the three blends listed here, place the essential oils in a 4- to 8-ounce jar. Add 3/4 cup of ethanol (I used vodka), and top off the bottle with distilled water. Shake, spritz and enjoy!

Winter Wonderland

  • 10 drops balsam fir needle essential oil
  • 10 drops juniper essential oil
  • 10 drops pine essential oil

Citrus Grove

  • 10 drops lemon or lemongrass essential oil
  • 10 drops orange or tangerine essential oil
  • 10 drops grapefruit or bergamot essential oil

Sugar & Spice

  • 10 drops clove or nutmeg essential oil
  • 10 drops cinnamon or anise essential oil
  • 10 drops vanilla essential oil

What about you? Got any natural, simple ways to freshen up a room? (Check out my post from last December on making a natural potpourri!) I’d love to hear them. With the holiday season right around the corner, having a go-to room spritzer on hand is just what you (and your guests) could stand to have around.

Images and styling by Jen Altman

christmas scent

(#3) Christmas Scent

Ingredients

  • 2 -4 tablespoons cloves
  • 2 -4 cinnamon sticks
  • 4 bay leaves
  • 1/2 oranges, sliced
  • 1/2 lemons, sliced
  1. Add orange and lemon slices to dry mixture of spices. Put in a small sauce pan with 4 cups of water (or apple juice/cider). Simmer on low to release the fragrance. IF you simmer it for a few hours, you will need to add more water occasionally so it doesn’t boil dry. Store in refrigerator when not in use, to prevent molding. It can be simmered over and over again! Always add more water to equal 4 cups before each use.
  2. TO GIVE AS A GIFT: put ingredients in a quart-sized decorative jar. Add enough water to fill jar. Add a few drops of red food coloring if desired. Close securely and give with a small gift tag explaining how to use it.
  3. Note, I prefer to use the lesser amount of cloves so that they don’t overwhelm the other fragrances.
Leave a comment
Share
  • Pin it
  • Share
  • Tweet
  • Share
  • Email

cranberry orange scones

11 / 29 / 12

Talk about perfect for the holidays… I found this delicious recipe for Cranberry Orange Scones on a blog that I follow, I’m an Organizing Junkie. It originally comes from Angie at her blog, Echoes of Laughter.  Please check out both blogs for tons of great ideas!!!  Thank you, Laura & Angie!  (Note to self:  Freeze some of the scones for nibbling come January 1st when I am poring over Laura’s site continuing my ongoing quest to GET ORGANIZED!!)

Hello Org Junkie Readers! I am so happy to be visiting with you today and sharing one of my favourites from the kitchen.

I am in love with scones. They are my favourite baked treat and I make them on a weekly basis. One of the reasons that I love scones, besides their tender goodness, is that I find that they are quick to mix up and quick to bake….there is just one sheet to bake, unlike cookies where you may have up to 4 sheets of cookies to go in the oven. If you are a regular visitor to my blog, then you know that I often share scone recipes and I am all about changing up the flavours and add-ins to reflect the current season! Cranberry Orange Scones are my most recent creation and are perfect for the upcoming Christmas season.

Scone recipes with buttermilk included are my favourite…the tenderness and flavour of the scones are so just so decadent and delicious that they are hard to resist….even if you are not a scone fan. When I am making scones to give as a gift, I often drizzle and sprinkle some goodies on top to give them a from-the-fancy-bakery look.

Cranberry Orange Scones

{makes 16 small scones}

Ingredients: 2 cups flour 1 tablespoon baking powder 1/2 teaspoon baking soda 1 teaspoon salt 2-3 tablespoons sugar 1/2 cup cold butter 1 1/4 cups buttermilk 1 teaspoon orange extract orange zest from 1 orange 1 scant cup frozen cranberries {I like lots of berries. Use less if you don’t!} Sanding sugar {coarse sugar} {optional}

To decorate the tops: {optional} 3 tablespoons craisins, chopped 3 tablespoons candied orange peel 1 cup white chocolate melting wafers, melted

Directions:

1.In mixing bowl, combine flour, baking powder, baking soda, salt, and sugar. Stir.

2. Cut butter into cubes and add into flour mixture. Use pastry cutter or 2 forks to cut butter into flour mixture until it resembles course crumbs.

3. Add cranberries, buttermilk, orange extract and orange zest. Stir with large spoon until soft dough forms.{If dough seems dry, add a little more buttermilk}. Turn onto floured surface {and flour your hands too!}and knead gently 7-8 times. Dough will be very sticky at first.

4. Divide dough into 2 discs. Pat each disc into a 6 inch circle. Cut into wedges with a sharp knife. Sprinkle with sanding sugar or regular sugar if desired.

5. Place wedges on a cookie sheet and bake at 425 degrees for 10-12 minutes, or until scones are puffed up and golden around the edges.

6. Cool scones on wire rack. To finish, drizzle with white chocolate and sprinkle with chopped craisins and candied orange peel.

Now you have a wonderful treat to share….perfect with a cup of tea or coffee!

Leave a comment
Share
  • Pin it
  • Share
  • Tweet
  • Share
  • Email

thanks giving ~ giving thanks

11 / 22 / 12

Sharing with you a beautiful Thanksgiving paper chain that I am going to be doing today with my entire family.  Print it off now, and celebrate the gift of gratitude.  For one another as well as all that you have been blessed with.  We are all guilty of taking people, situations, life… for granted.  Today is a day to pause, reflect and cherish all that is a part of you in this world.  We are blessed.

thanks giving ~ giving thanks.

2 Comments
Share
  • Pin it
  • Share
  • Tweet
  • Share
  • Email

Posts navigation

Previous Page 1 2 … 8 9 10 11 12 … 15 16 Next Page

Hello, friends!!

I love mismatched chairs and organized closets; springtime thunderstorms and Sunday morning coffee; pearls and puppy breath; welcome home hugs and walking the beach; fresh flowers and flea markets; autumn leaves and afternoon tea.

Follow Me!

  • Facebook
  • Twitter
  • Pinterest
  • Instagram
  • Email
  • RSS

Pins!

  • Choppy Piece-y Blonde Bob #ShortHairstyles
  • Coastal Living™ by Universal Furniture Solid Coffee Table | Wayfair

Recent Posts

  • creations test post
  • home
  • happy fourth…
  • be the bird
  • zucchini corn pancakes

Categories

  • create
  • dream
  • laugh
  • live happy
  • love
  • Uncategorized
  • yummy
Site made with ♥ by Angie Makes
Angie Makes Feminine WordPress Themes